Talend Open Studio for Data Interation
What
is Talend ?
According
to Rafael
Herrera, Head of BI International at Groupon
“Talend
is cost-effective, easy to use, readily adaptable and extremely
versatile. With the help of the graphical user interface we can
easily and quickly link up a large number of source systems using the
standard connectors!”
It
is an open source software vendor that provides data integration,
data migration, data management, enterprise
application integration and big
data software and services.
If you don't know what is Data Integration then click to know data integration.
If you don't know what is Data Integration then click to know data integration.
What is Open Studio for Data Integration ?
It is an open source application.
It has got graphical development environment for designing and
developing data integration job. It has many utility functions that
helps to integrate data with the application faster and easier.
Exporting any excel or delimited file data to database becomes easier
with this application.
Following example will help to
introduce you with the tool.
Example 1 (Inserting CSV file data into database) :
Prerequisite : Install the
Talend Open Studio for Data Integration. If you have not installed
then please read the installation guide. <a href=””>Talend
Open Studio for Data Integration Installation Guide</a>.
Step 1 : Start the Talend Open
Studio for Data Integration.
Step
2: Create a CSV file in your file system. Say you have created
Student.csv and the contents of the file is as below
Roll,Name,Age,Address
1,Ajijul,20,Kolkata
2,Anirban,19,Mumbai
3,Ankita,20,Delhi
4,Monojit,22,Chennai
5,Saumajeet,21,Kolkata
Step
3: Create
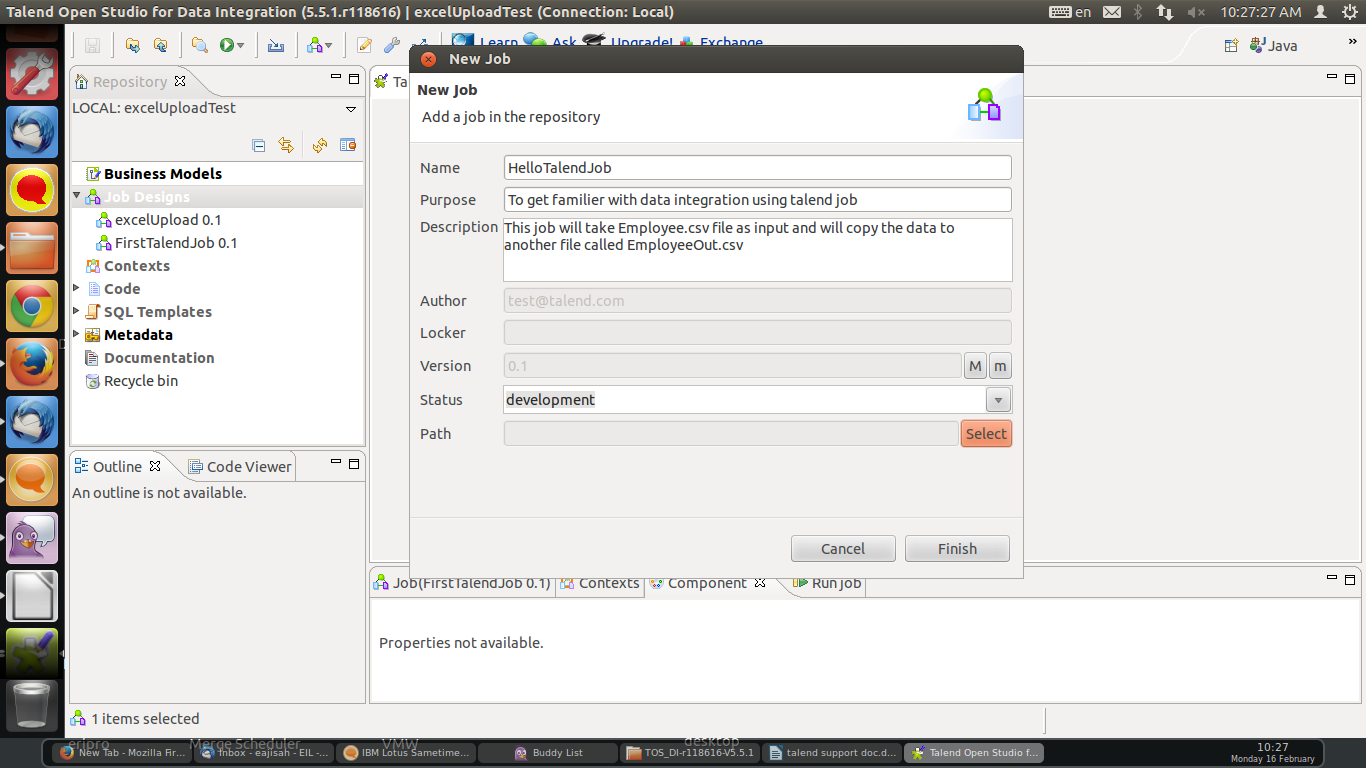
a new job
 |
| new Job Window |
-
Right click on Job Design link that is in the Repository tab.
-
Click on Create Job
-
A overlay window will come that will contain different fields. Fill them up. Refer the below screen shot.
-
Then click on Finish.
Step 4: Now find the Pallet tab right of your IDE.
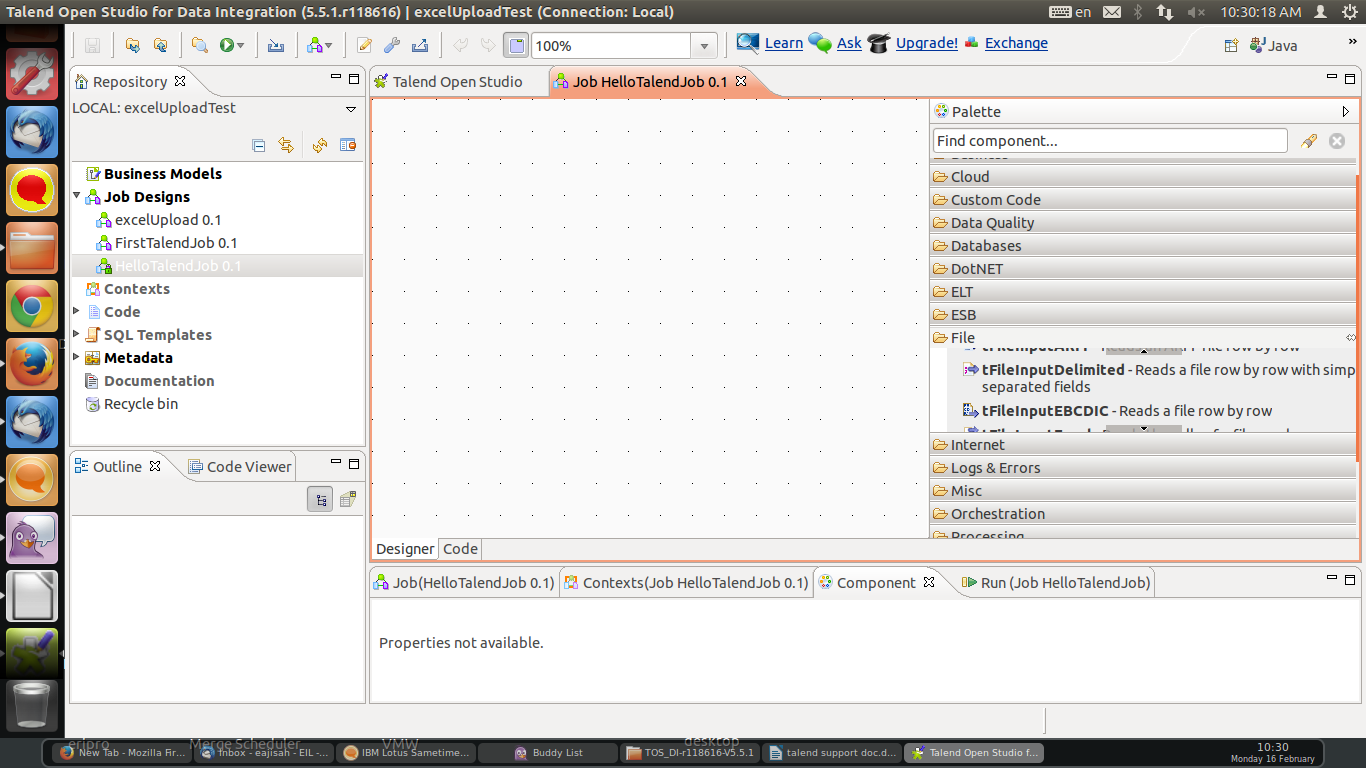
Step 5: Under File/Input directory you will find tFileInputDelimited.
Drag that to the workarea.
Refer the screen shot.
 |
| tFileInputDelimited |
Step 6: Under Processing directory
you will find tMap. Drag
that into your work area.
Step 7: Under File/Output directory
you will find tFileOutputDelimited.
Drag that to work area.
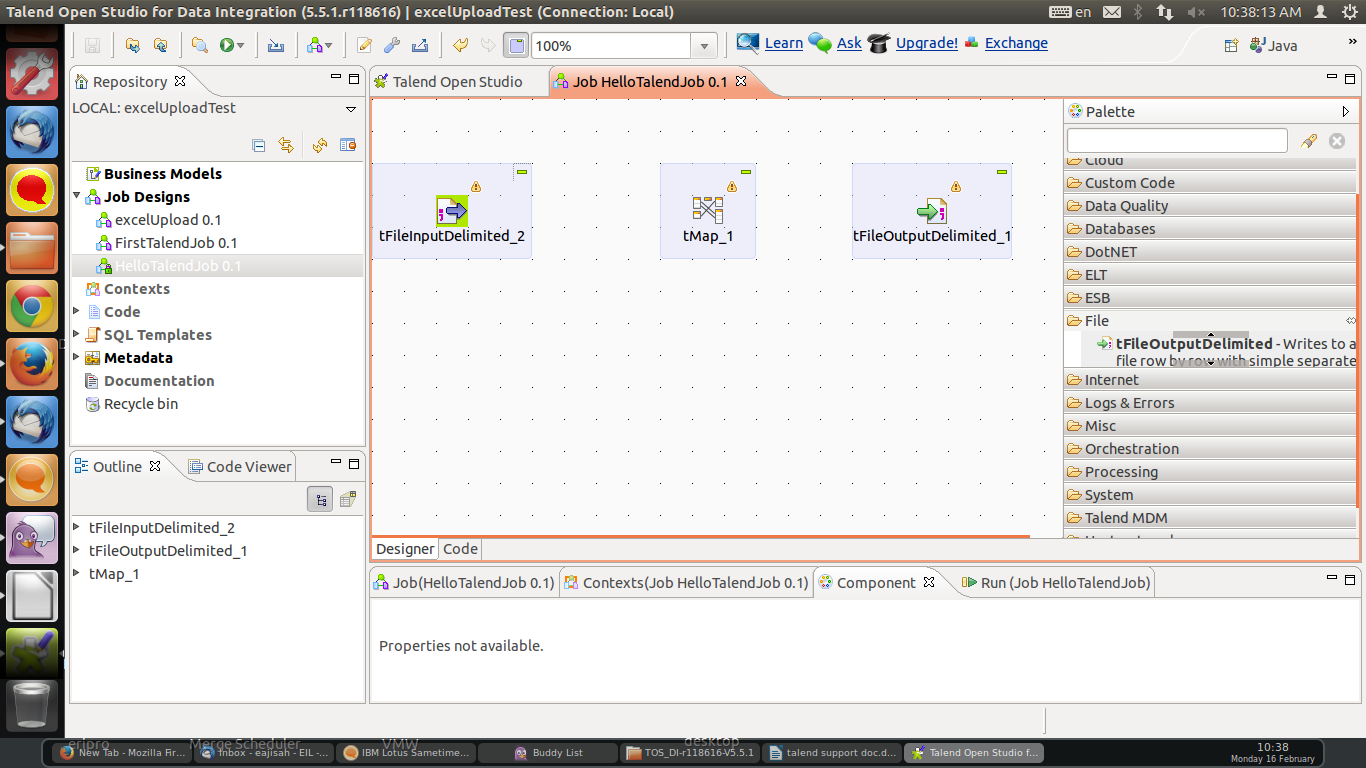
Now the work area will look like
this -
 |
| components in workspace |
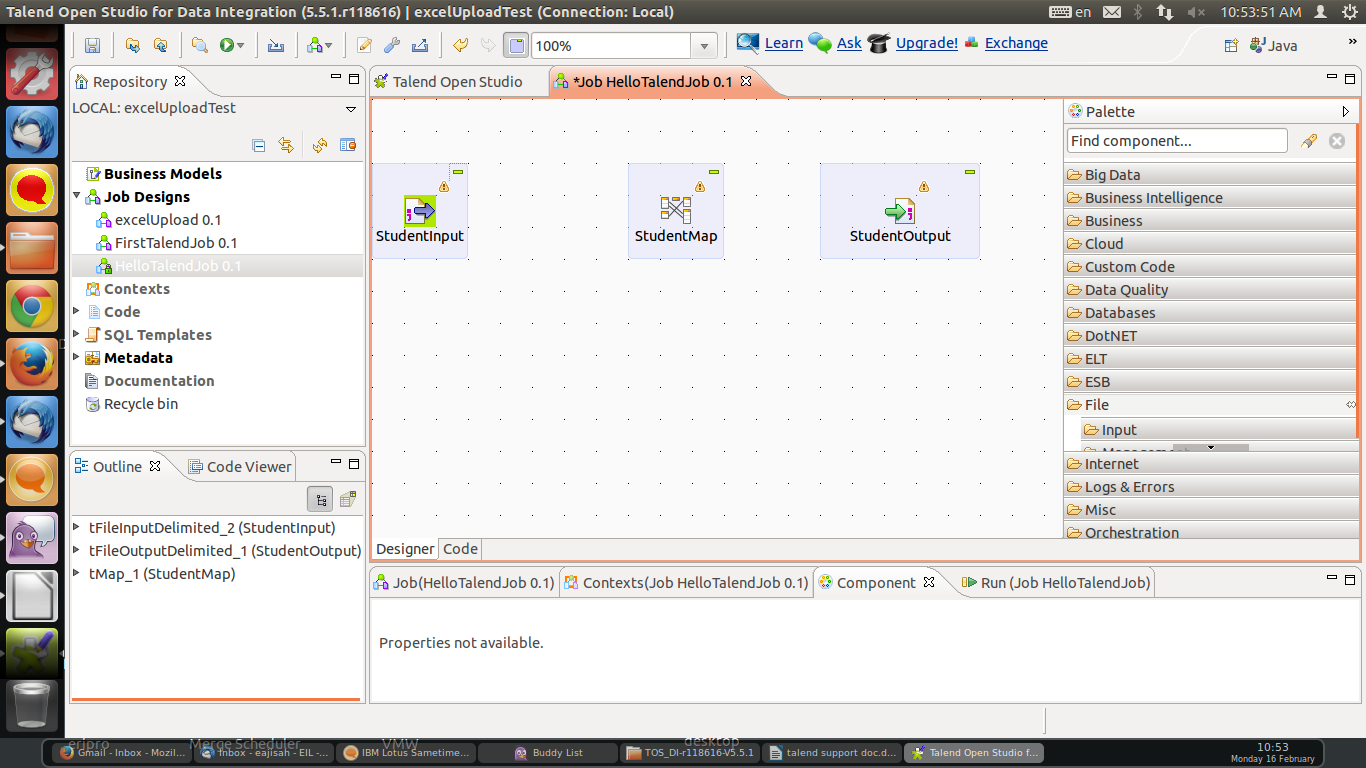
Step 8: It is recommended to rename
all the component that is in you work area to increase usability.
Click on the name of the component and then click again (Not double
click. A click then 1 sec pause then again click) then enter a
relevant name you want to give. So I am changing
tFileinputDelimited_2 to StudentInput, tMap
to StudentMap, tFileOutputDelimited_1
to StdentOutput. Refer the screen shot.
 |
| rename |
Note: You can see the yellow
caution symbols in each component. Yo can hover on it to get more
details. Lets leave that for future use. In your editor you will also
see two tabs. One is Designer and other one is Code. You are
currently on Designer tab. You can toggle between these two tabs. The
Code tab contains the Java code that is generated in the back end
according to your design. The java code is read-only. You can't
modify it but it will help you to debug your design and fix any
issue. You will gradually learn.
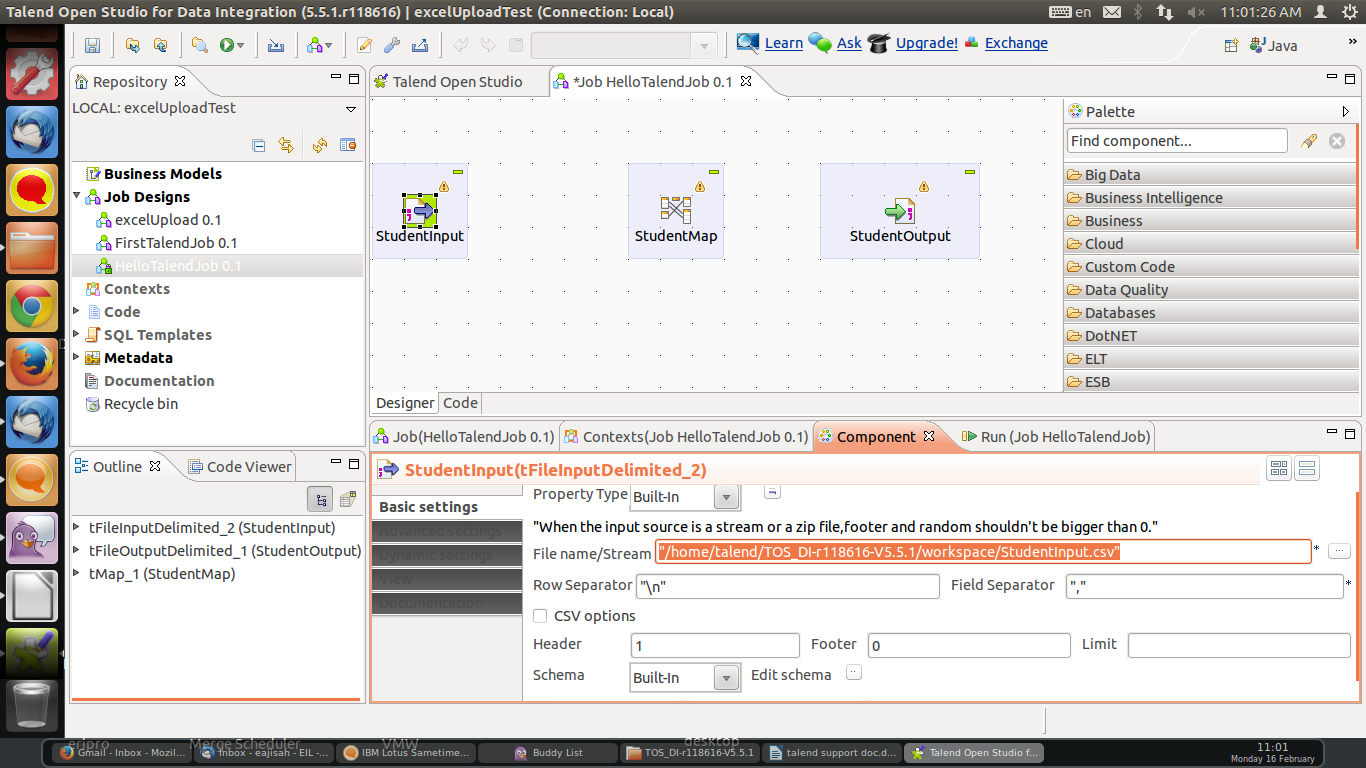
Step 9: Now click on the
StudentInput component. Under component tab, you can change input
file path. You can change them if you want. Refer the screen shot.
Here '\n' is row separator. ',' is
filed separator, Header 1 means you are including header. If you have
n headers you will write n there. You can change any of these
according to your input file format.
Step 10: Now you have to map
StudentInput to StudentOutput using StudentMap. Right click on the
StudentInput component. Click on Main in the menu then click on Main
in the sub menu. A link with
a plug icon will come place that onto StudentMap.
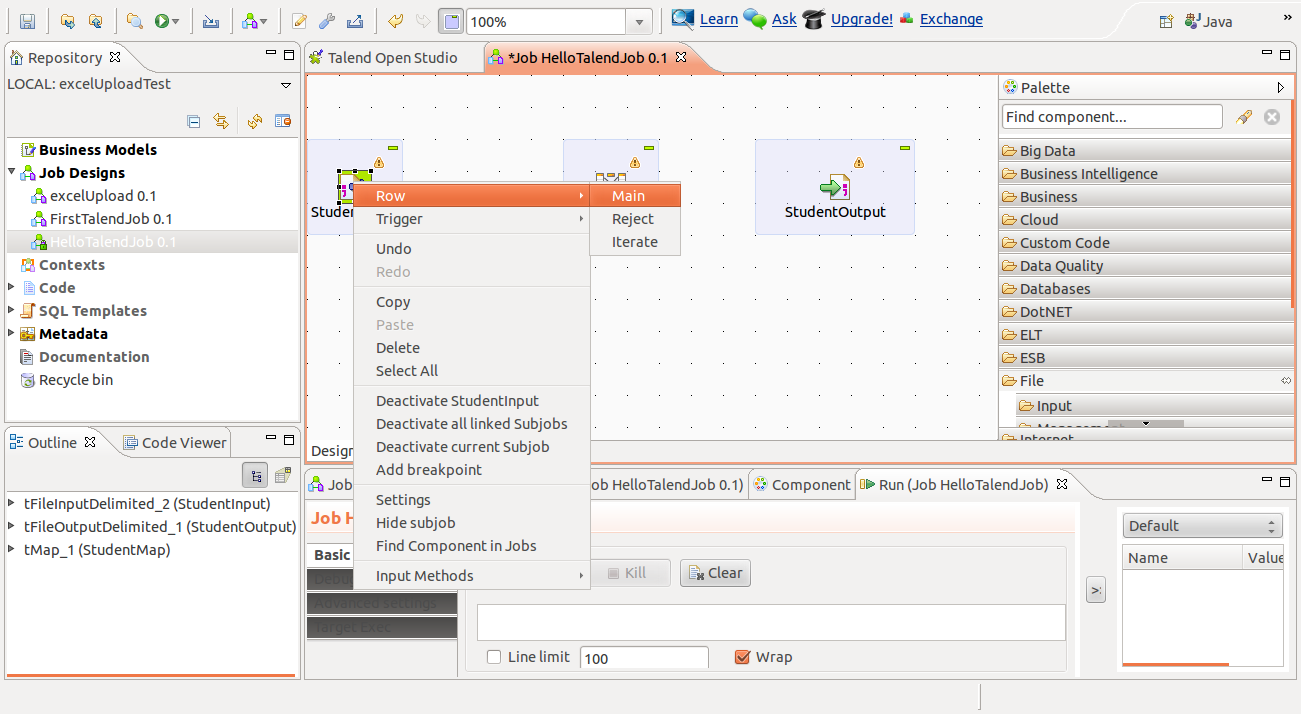 |
| Mapping input file |
Then right click on the
StudentMapComponent click on the menu Row. Then click on the *New
output*(Main)
sub menu then another link will come place that onto
StudentMapOutput. Give a name to the output say result. Refer the
screen shot.
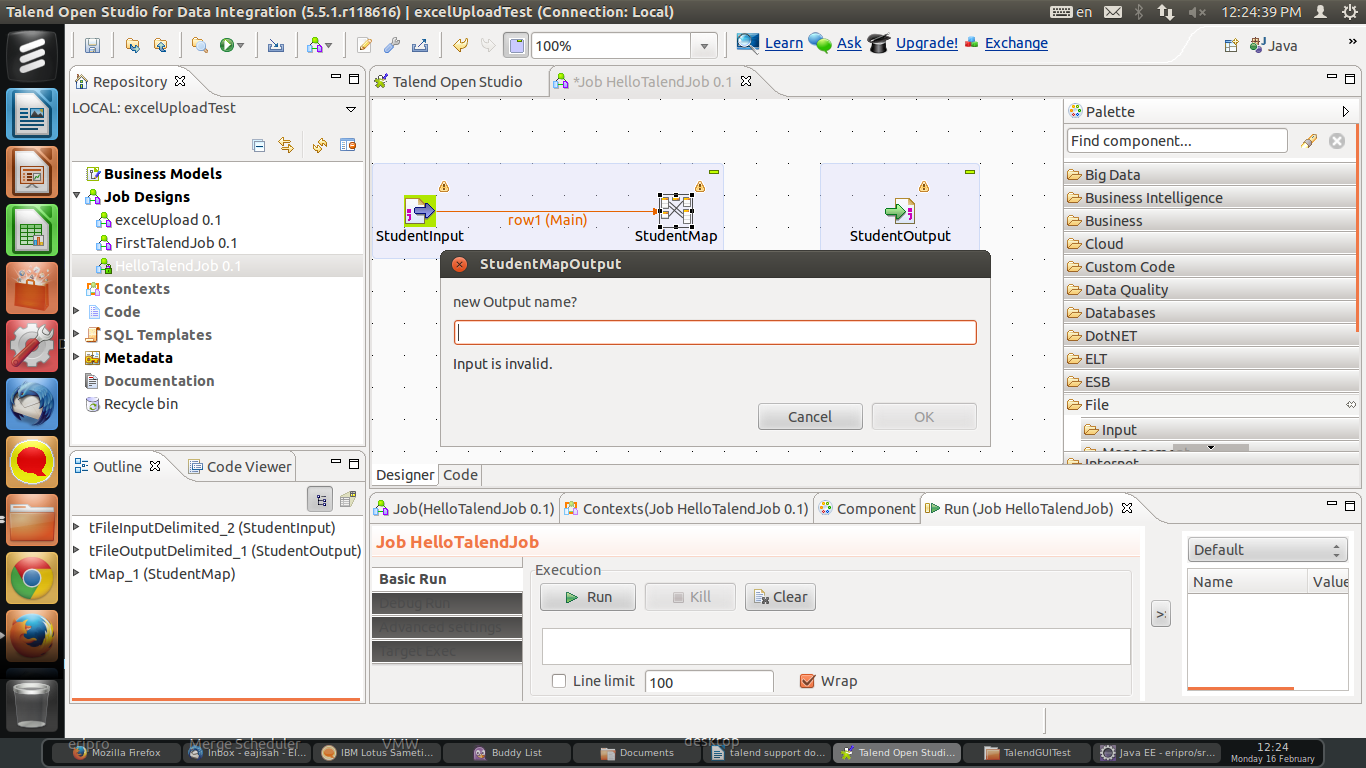 |
| StudentMap Output |
Rename the input link for ease of
use. After that it will look like this -
Step 11: Now click on StudentMap component. Under component tab
select Basic Setting. Then click on the button next to Map Editor.
This will open a window like this -
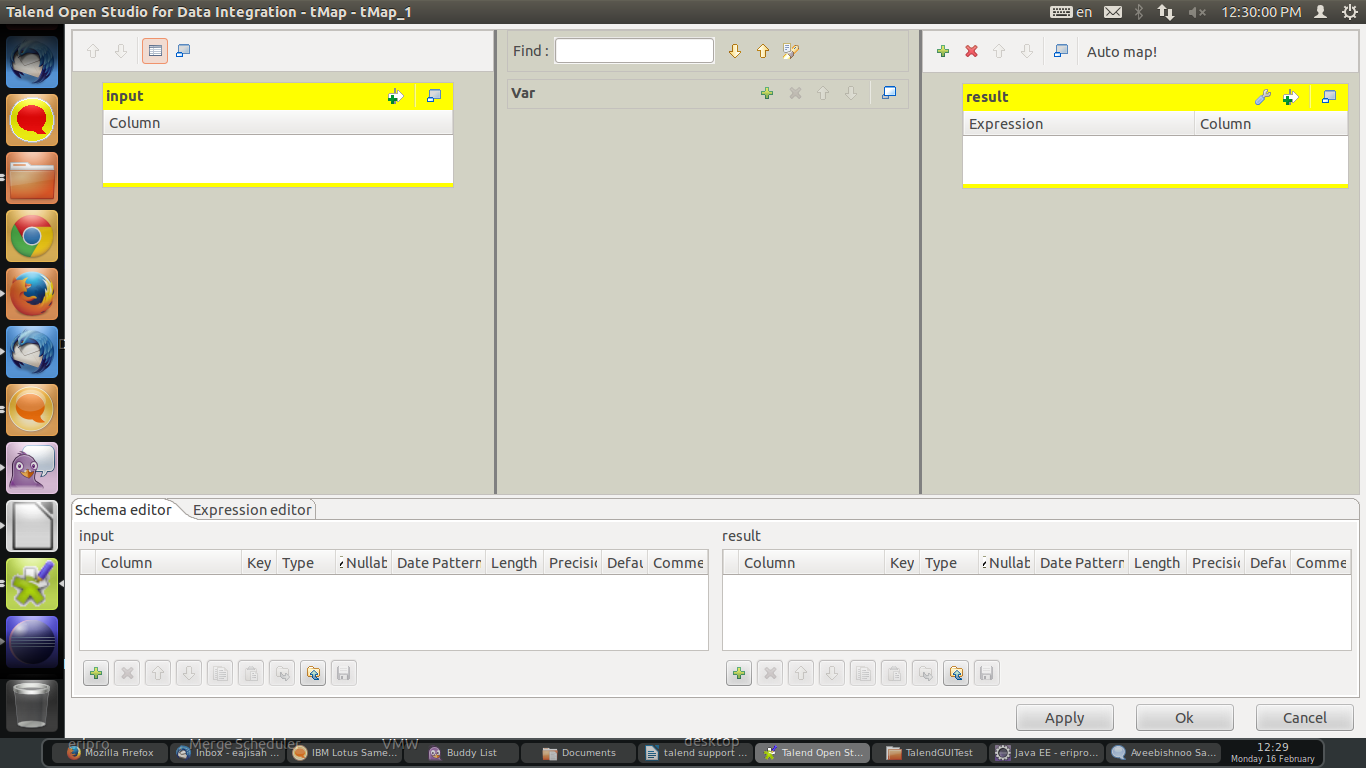 |
| StdentMap Editor |
Step 12: Add Columns in schema editor for input and result using '+'
button . You can also delete the same using '–' button.
Refer the screen shot.
Step 13: Now you have to map input
columns to output columns. If you have given the same name then click
on Automap. This will automatically map input firlds to output
fields. Otherwise you can drag input fields to output fields. The
click OK. Refer the screen shot.
Step14: Now click on StudentOutput.
You can modify it's path like StudentInput.
Now you Job is ready. You can
execute the job.
Executing Job:
Step 1: Click on the Run Tab.
Step 2: Under Basic Run menu click on the Run button. The program will run and your output file will be generated. Refer the screen shot.
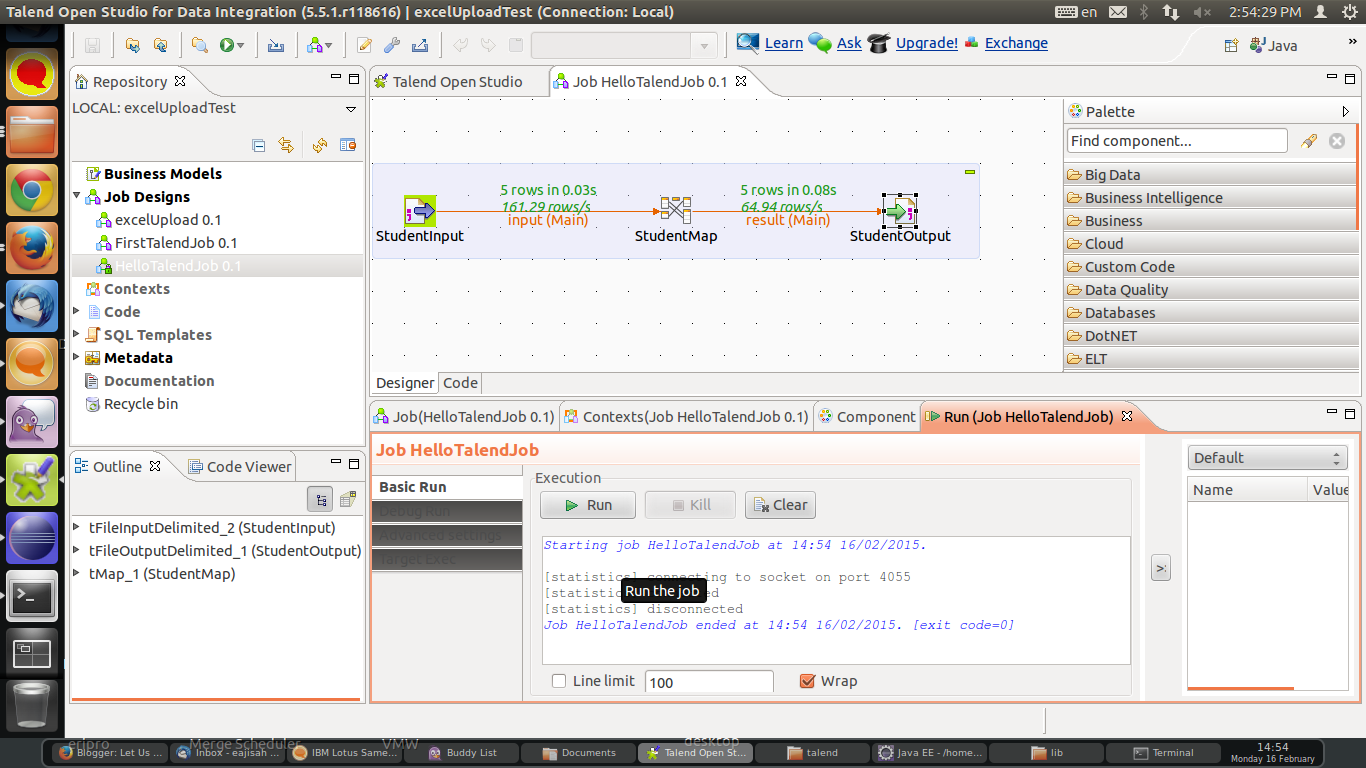 |
| Run Talend job |
Your output should
be :
StudentOut.csv
1,Ajijul,20,Kolkata,AjijulKolkata
2,Anirban,19,Mumbai,AnirbanMumbai
3,Ankita,20,Delhi,AnkitaDelhi
4,Monojit,22,Chennai,MonojitChennai
5,Saumajeet,21,Kolkata,SaumajeetKolkata
_______________________________________________________________________________________________
Hope you enjoyed learning. Any feed back will be helpful.
Thanks for the article. I like your blog, I sincerely hope that your blog is a fast-growing traffic density, and to help promote your blog. Talend Open Studio for Data Integration is an open source graphical development environment for creating and deploying custom integrations between systems. It is easy to use and reduces the time taken to develop integrations.
ReplyDelete